Single sign-on (SSO) allows you to access your Redox dashboard account using a third-party identity provider (IdP). SSO helps control user access policies via a central resource for your organization.
Redox supports:
- identity providers compatible with the SAML protocol
- SSO initiated from Redox, not identity providers
With SSO, a user from your organization enters their email on the dashboard login page, which then redirects them to your identity provider for authentication. If successfully authenticated, they're redirected back to the dashboard as a logged-in user.
If you run into any errors with SSO, refer to our troubleshooting tips.
For Standard (and above) customers, an organization owner can follow these steps to turn on SSO:
- Log in to the dashboard.
- On the navigation menu, your username displays at the bottom. Click your username for the user menu to appear.
- From the user menu, select the Organization Profile option.
![Organization Profile option of the user menu]()
Organization Profile option of the user menu - By default, the Organization Info page displays. Click the Settings tab.
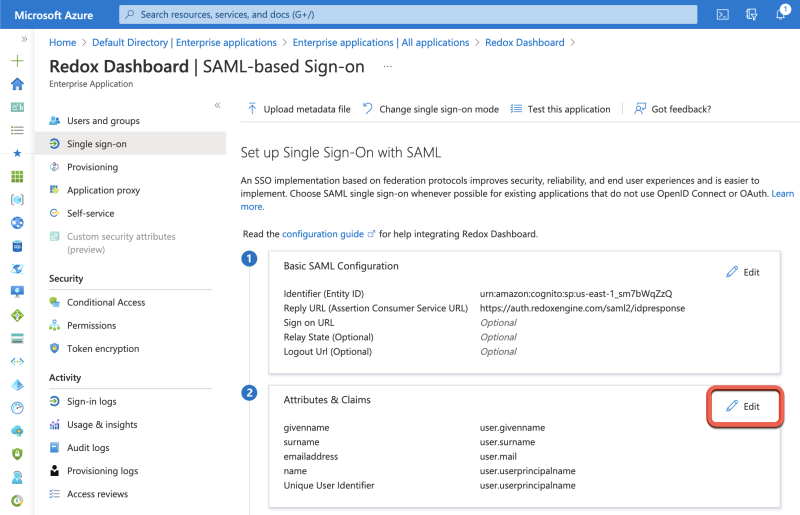
- The SSO information displays. First, we provide the Redox authorization server values. Use the Connection name value and Audience restriction value in your IdP configuration.
![Redox authorization server values]()
Redox authorization server values - Next, the Identity provider configuration contains details about your IdP. Specific configuration details vary between IdPs, but the basic process is the same. Fill in the relevant fields:
- Name: Enter a friendly name to represent your IdP.
- Domain name: This field automatically populates with the company domain and isn't editable. The domain is where your organization's users have an email account.
- Configuration mode: Select the radio button option for one of these two options.
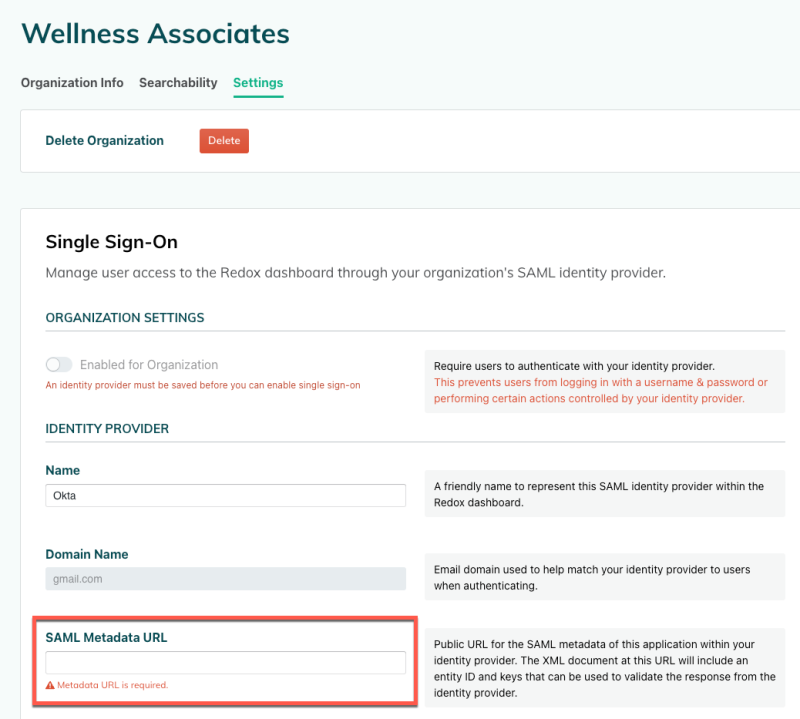
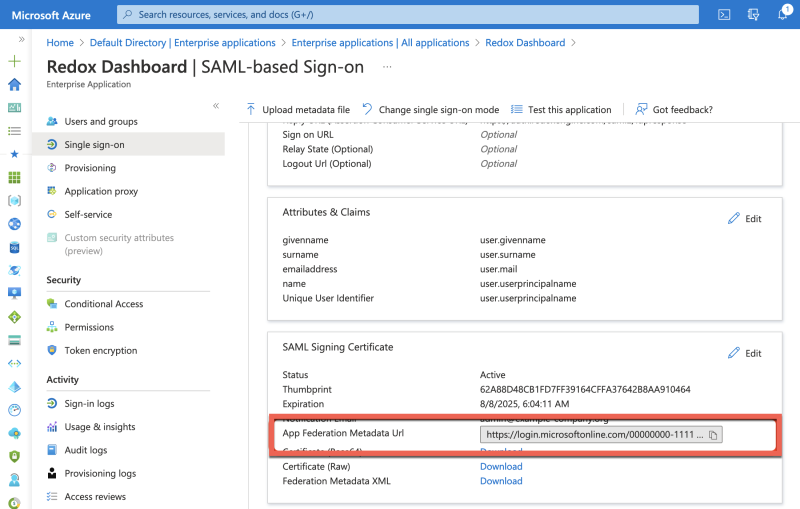
- URL import: Enter the public URL for your SAML metadata XML document. Redox pulls the entity ID and keys to validate the response from the IdP.
![IdP configuration - Import option]()
IdP configuration - Import option - Manual: Provide the entity ID and keys yourself.
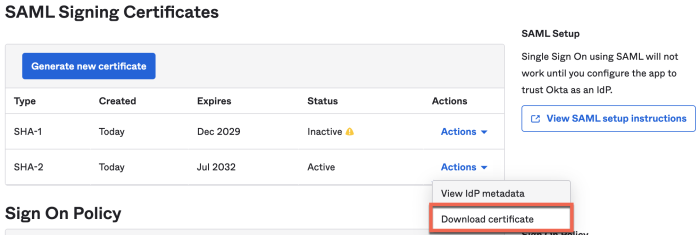
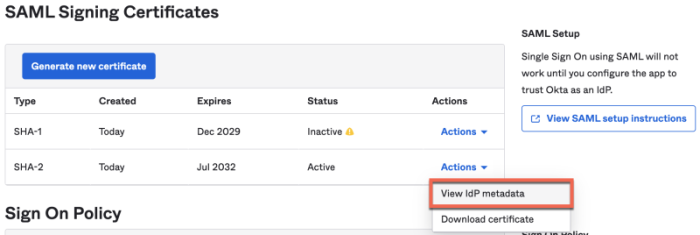
- Signing certificate: Enter the public key that your IdP uses to sign requests. This should be an X.509 certificate encoded in PEM or CER format. You can download the certificate from your IDP's system. Review the instructions for locating the certificate for your relevant IDP at the end of this page.
- Sign-in URL: Enter the redirect URL for users in your organization to log in to the IdP.
![IdP configuration - Manual option]()
IdP configuration - Manual option
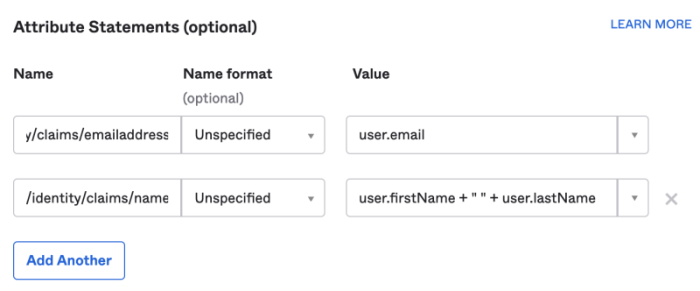
- Confirm the Attribute mapping. These fields populate automatically, but you should confirm them or adjust as needed.
![Attribute mapping]()
Attribute mapping - User full name: The name of the SAML attribute that your IDP uses for a user's full name.
- User email: The name of the SAML attribute that your IDP uses for a user's email address.
- Once you've populated the editable fields and confirmed everything, click the Save button.Test before enabling SSO
- Under the Organization Settings, an Enabled for Organization toggle appears. If you choose to disable SSO later, you can toggle this option to off.
![SSO enabled for your organization]()
SSO enabled for your organization - After saving successfully in the dashboard, you must refer to your IdP for instruction on how to configure the SAML protocol from their end.IdP instructions
- Once you've successfully enabled SSO in both the Redox dashboard and your IdP, all users must log in via SSO going forward. Previous username and password credentials no longer work.


After SSO is enabled, any new user who successfully authenticates via your identity provider is added to your organization. Existing users of your organization may not join another Redox organization.
Lastly, keep in mind that user access may be revoked by your IdP.
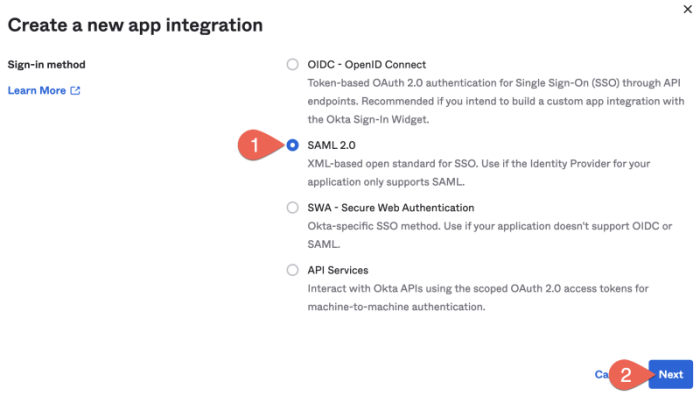
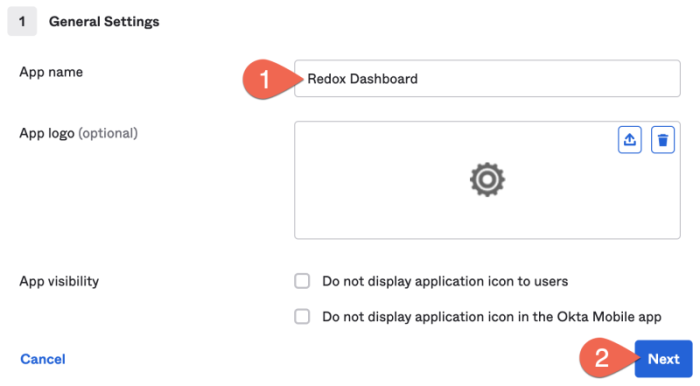
Follow the instructions for your given IdP to enable SSO. For your convenience, we have instructions for the following IdPs.