
You can self-serve to set up API sources (i.e., JSON via HTTPS) to send data to Redox. Learn more about sources.
To create non-API sources, talk to your Technical Account Manager.
- A user must be assigned to an engineer role to manage sources. Learn about user roles.
- You must be part of the closed beta with Redox to create non-API sources (i.e., SFTP, MLLP). Talk to your Technical Account Manager if you have questions.
- To delete a source, you must be logged into a development or staging environment. Production sources can’t be deleted without a Redoxer.


Follow these steps to view any existing sources.
- Log in to the Redox dashboard.
- From the navigation menu, click the Developer page.
- By default, the Sources tab opens with any configured sources. To view a specific source’s configuration details, click the source row in the table.VPN status for MLLP sources
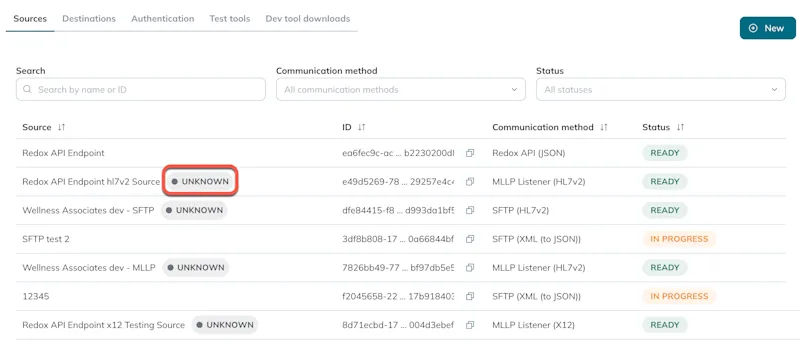
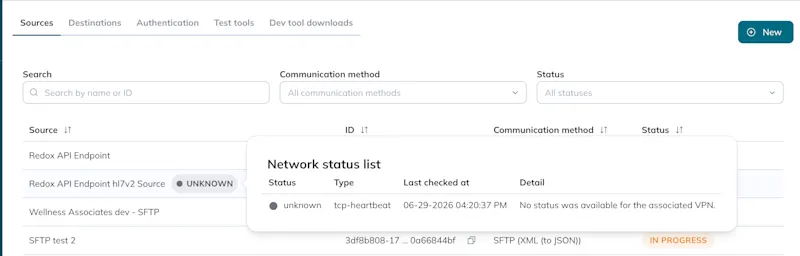
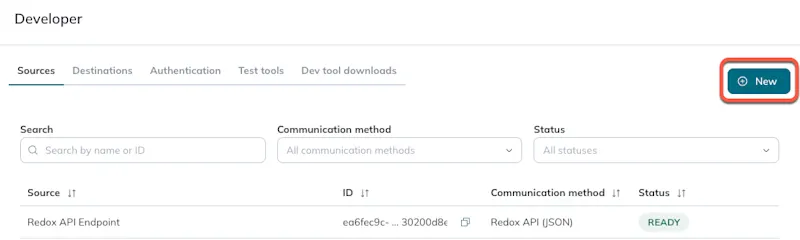
On the Sources tab, click the New button to open the source wizard. The instructions below take you through each step of the source wizard.
- Enter a human-readable name for the source. This will be the display name on the Sources tab.Source names
- (For multi-region users only) From the Region drop-down field, select the Redox service region.
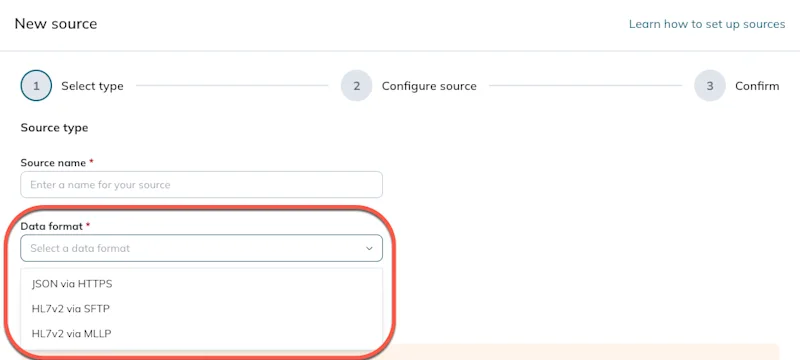
- From the Data format drop-down field, select the format of the data and how it will be sent (i.e., source type). Currently, you can send JSON via HTTPS (i.e., API sources only).Beta users
- (Optional) From the Sending system type drop-down field, select the EHR system this source will pull data from. Begin typing the EHR name to filter the list or enter a free text name if you can’t find the one you’re looking for.
- Click the checkbox to acknowledge that you’re creating a source for your own Redox organization, not your connection. This is a legal requirement, so you can’t proceed without this acknowledgement.
- Click the Next button. You can also click the Cancel button to discard the new source configuration.

Step 1: Select source type
Enter the configuration details based on the source type.
Save progress option





- The Confirm tab opens with a summary of the settings you’ve configured. When you’re finished reviewing, click the Finish button. Or, click the Back button to change any settings before confirming.
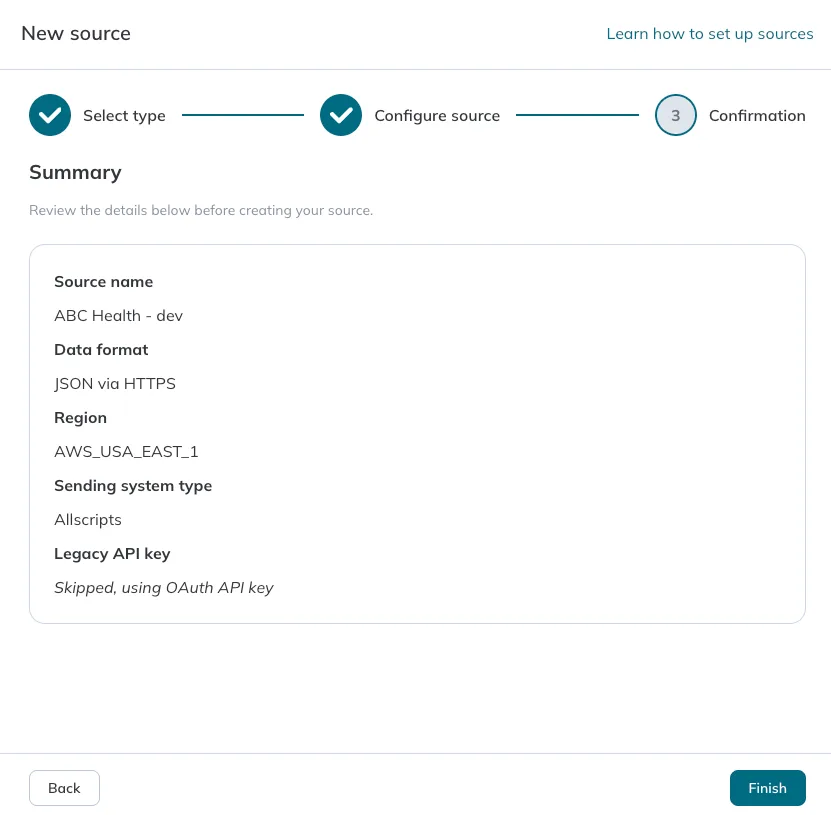
Step 3: Confirmation - The source is created and its confirmed settings display.
For SFTP or MLLP sources, create a subscription for each config link you added.
For API sources, authenticate an API key to start sending data.
Authentication how-tos
- Follow the steps to view sources.
- Find the source you want to rename and click anywhere in its row.
- The Details page opens. Under the Source details section, click the Edit button.Sources you didn’t create
- The Name field becomes editable. Revise the name, then click the Save button.
Edit a source name
Can’t delete production source
- Follow the steps to view sources.
- Find the source you want to delete and click anywhere in its row.
- The Details page opens. Click the Delete button in the top-right corner.
- A modal appears asking you to confirm the deletion. Click the Delete button to confirm—or the Cancel button if you changed your mind.
Delete a source
Platform API endpoints